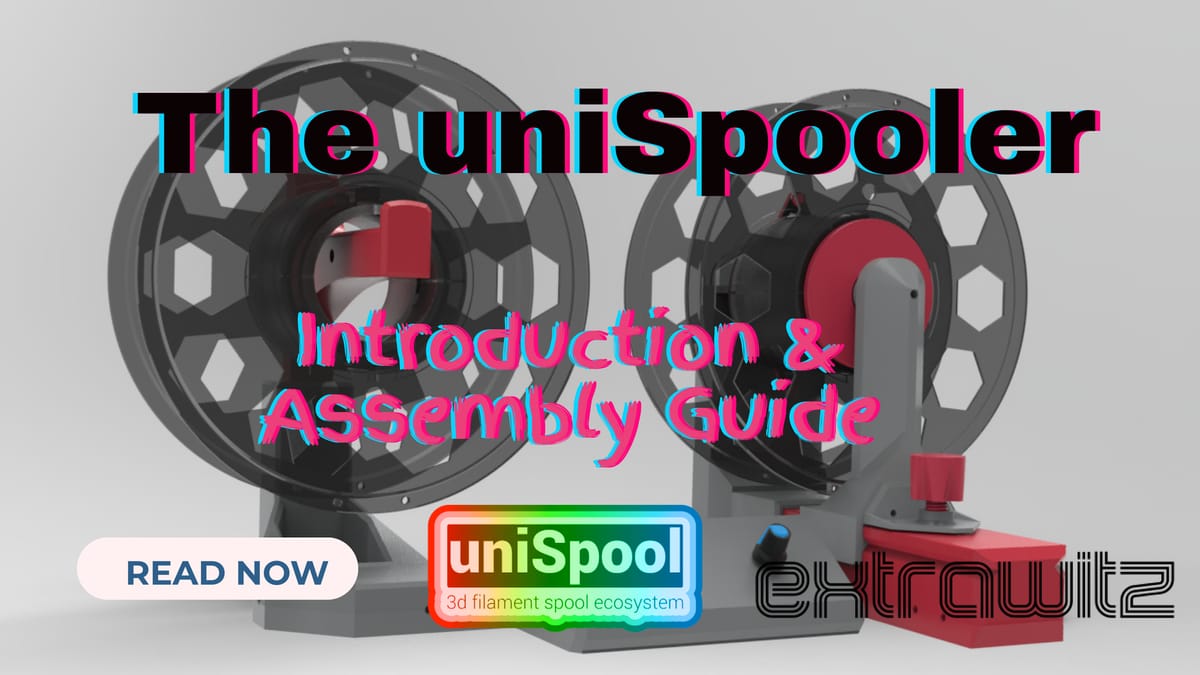
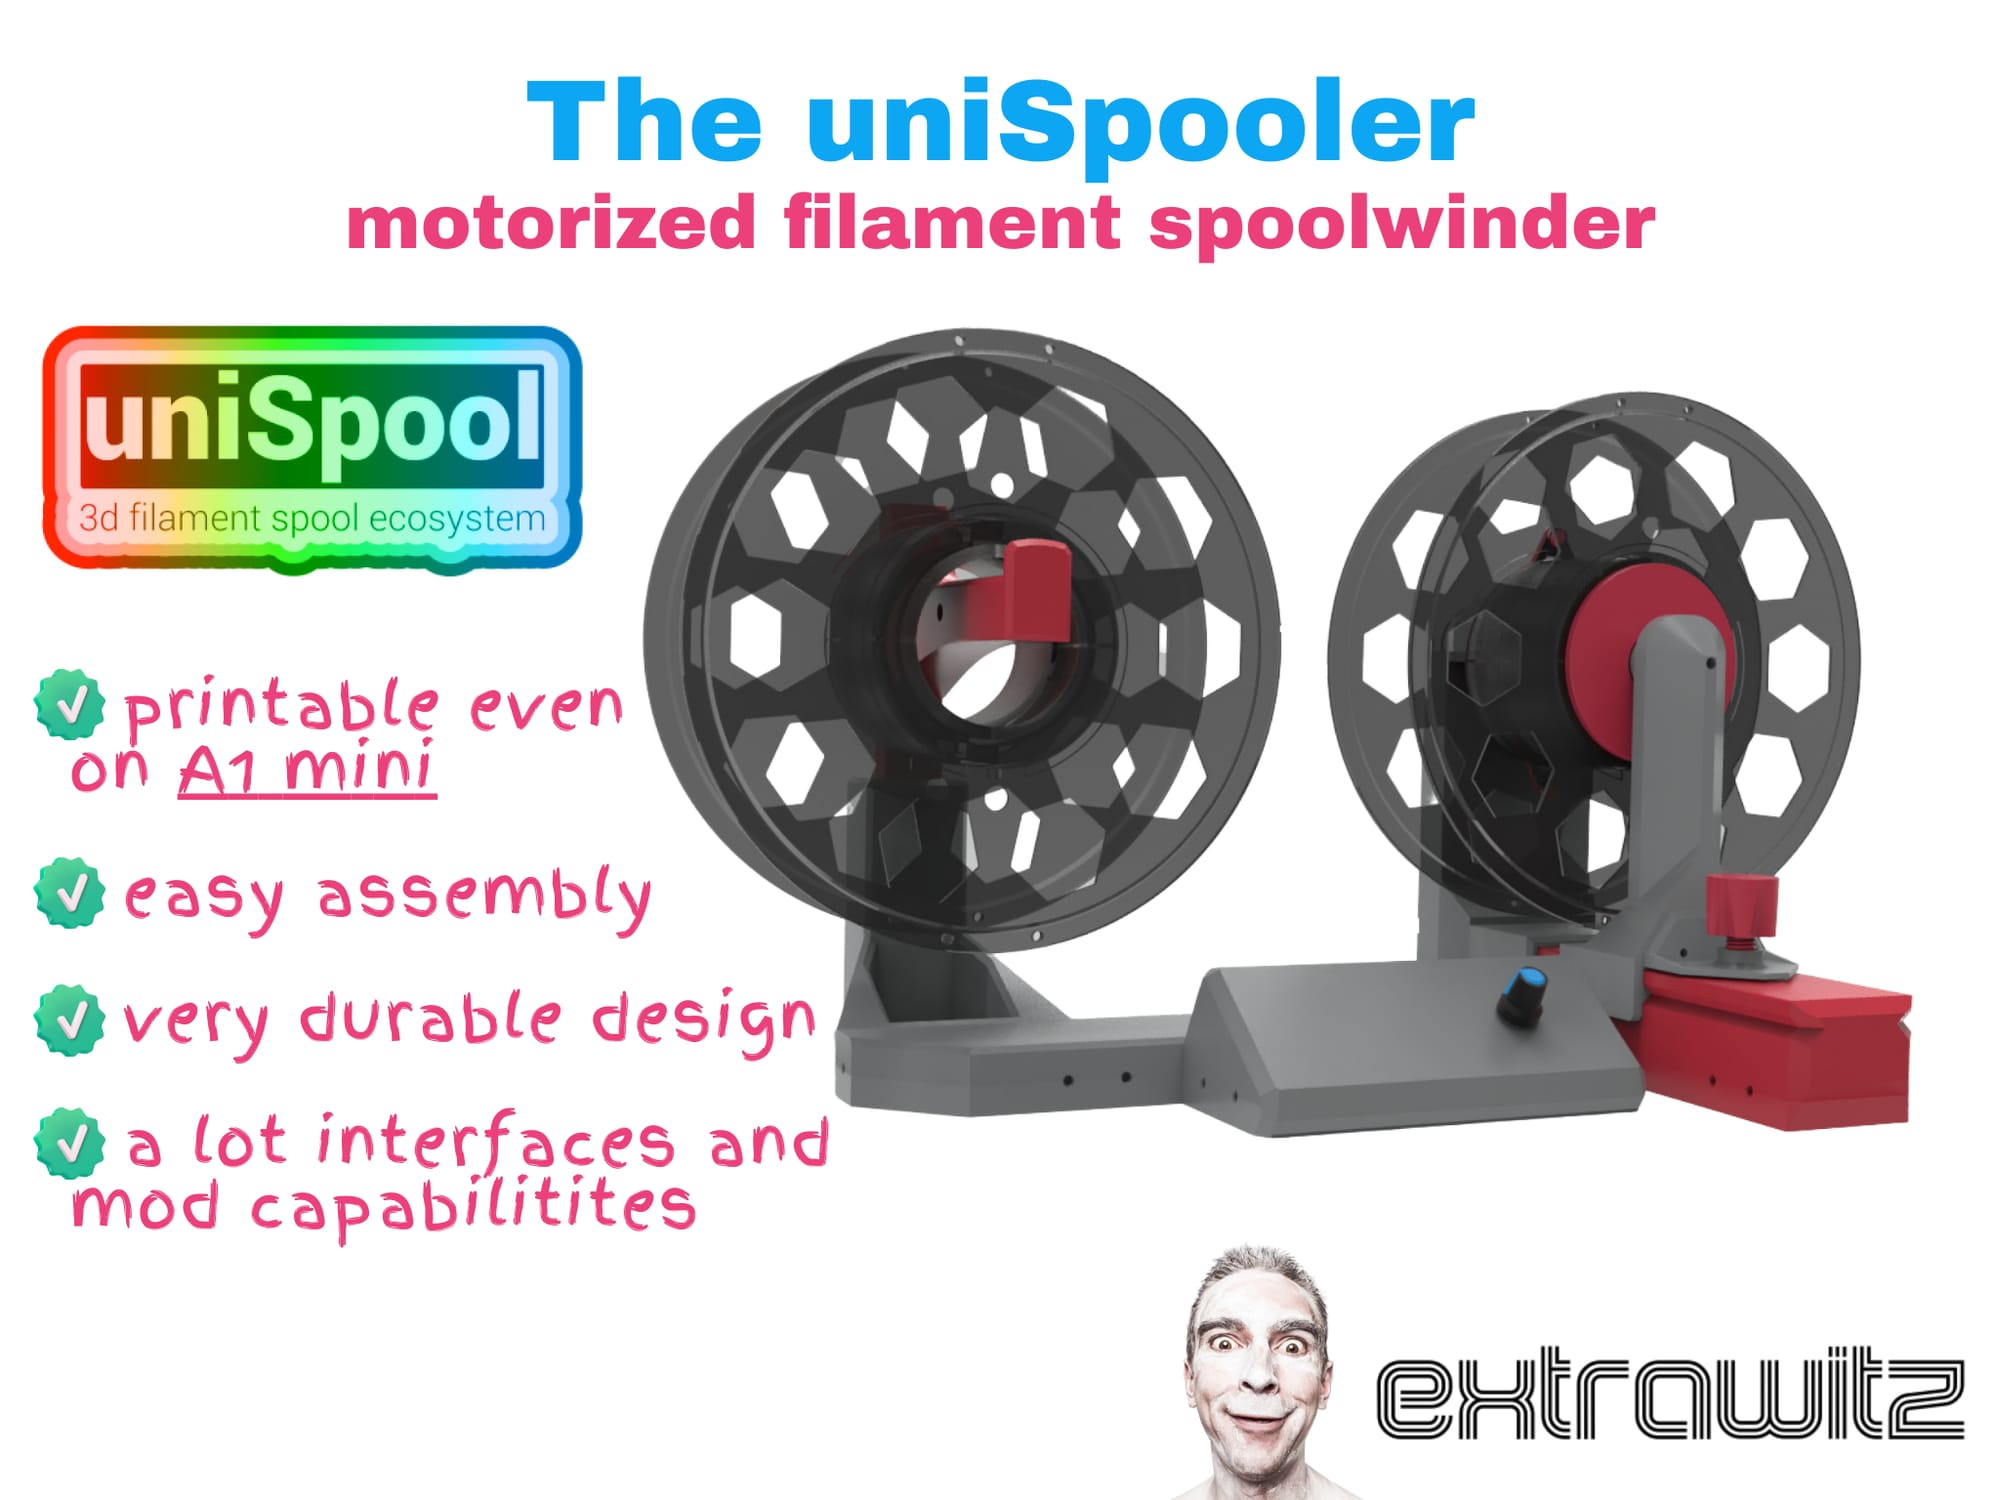
The uniSpooler - 3D printed motorized filament spool winder
After weeks of tinkering and my wife almost calling the police to search me, I am happy to release the uniSpooler.
The uniSpooler is a 3D printed, motorized filament spool winder with an easy to craft approach. This is the result of 80+ hours of designing, printing, testing and refactoring.
The uniSpooler rendered as JGB37-520 edition (simple version).
The story why I created the uniSpool and the uniSpooler
All started with my Bambu Lab 3D printers and their AMS multi-material systems. When I bought the X1 Carbon Combo in 2022, there was beside the "wow" also a "huh, I have now to care about filament spools 😑".
I took it now 2 years and was always frustrated when new filament from a brand arrived, which doesn't fit the Bambu AMS systems. This was especially the case for the AMS lite for my A1 and A1 mini (such a diva).
I searched on the web for solutions, but nothing made me really happy. I even started a Reddit which got some clever feedback, but nothing was a solution for me.
What are your favorite filament winder projects you actually use frequently?
by u/extrawitz in 3Dprinting
Finally, I decided to take the Christmas break 2024 for a project on my own. Viola, the uniSpool and uniSpooler were born.
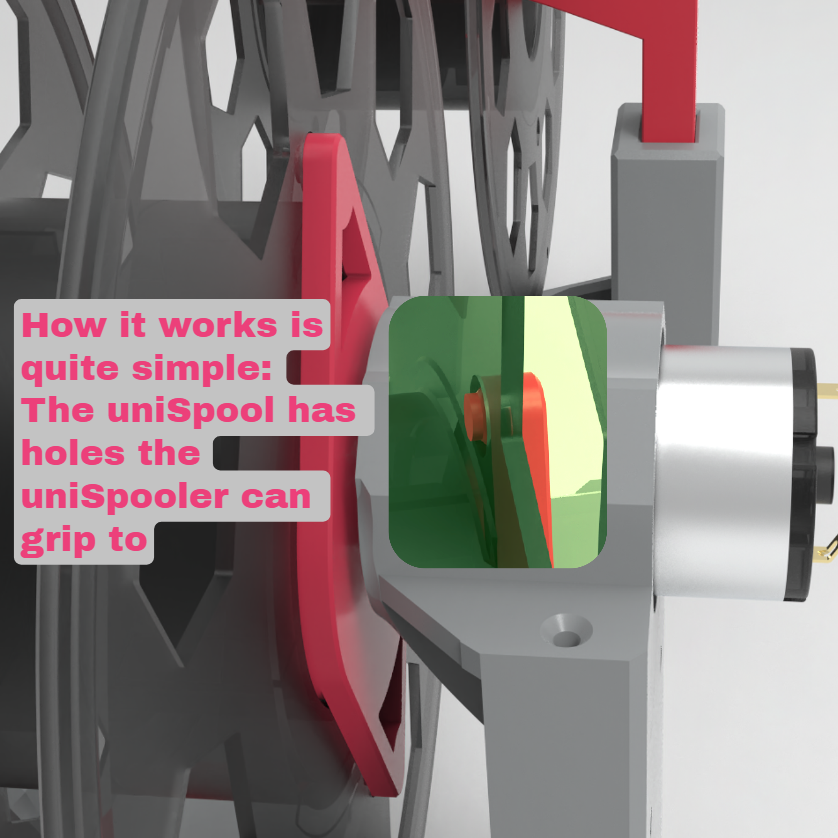
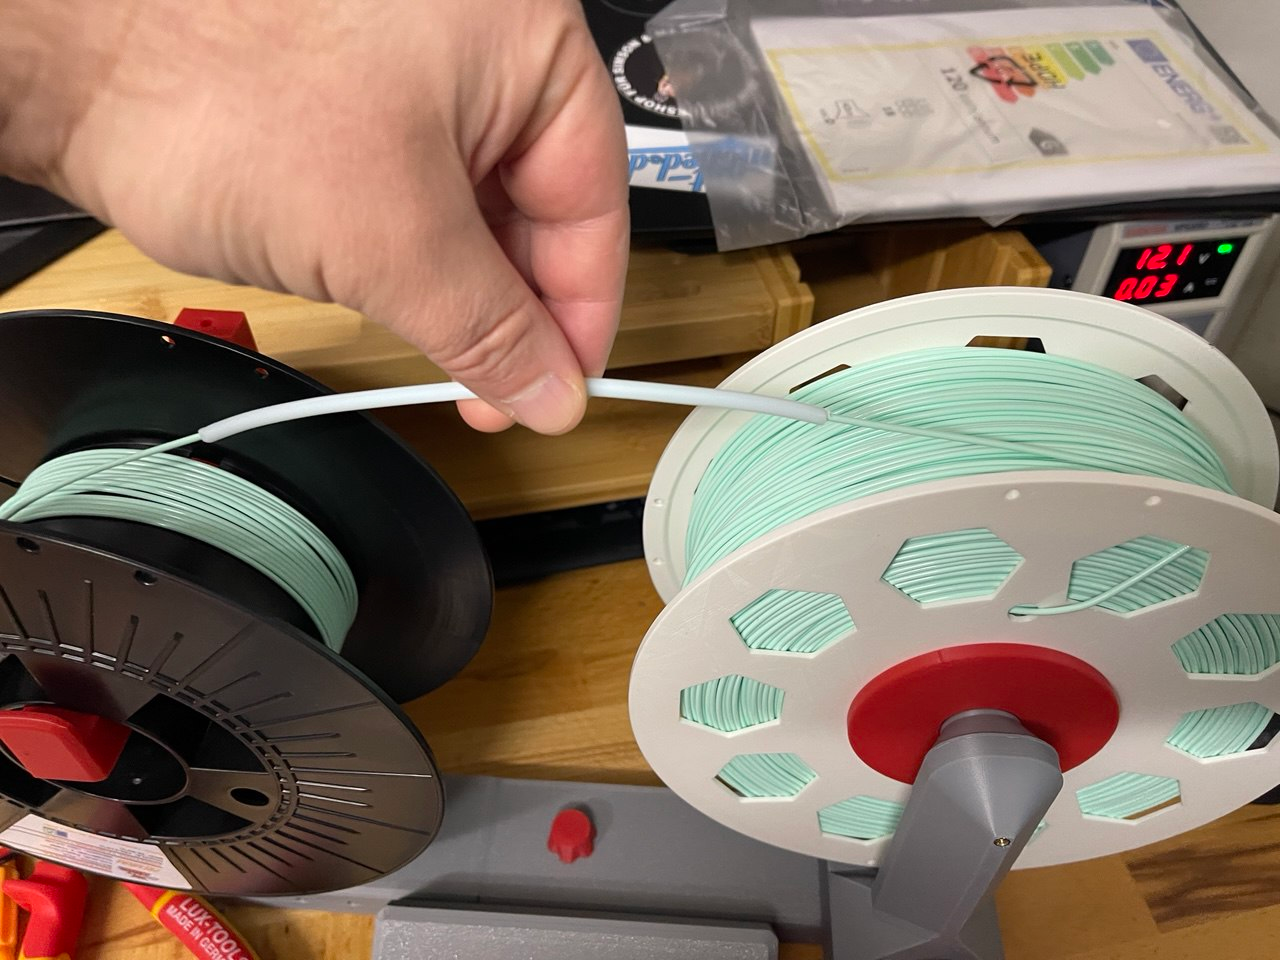
You can use the uniSpooler to even respool bigger sized spools to a uniSpool (2.5kg in this case). The passive hanger has a hole for that purpose.
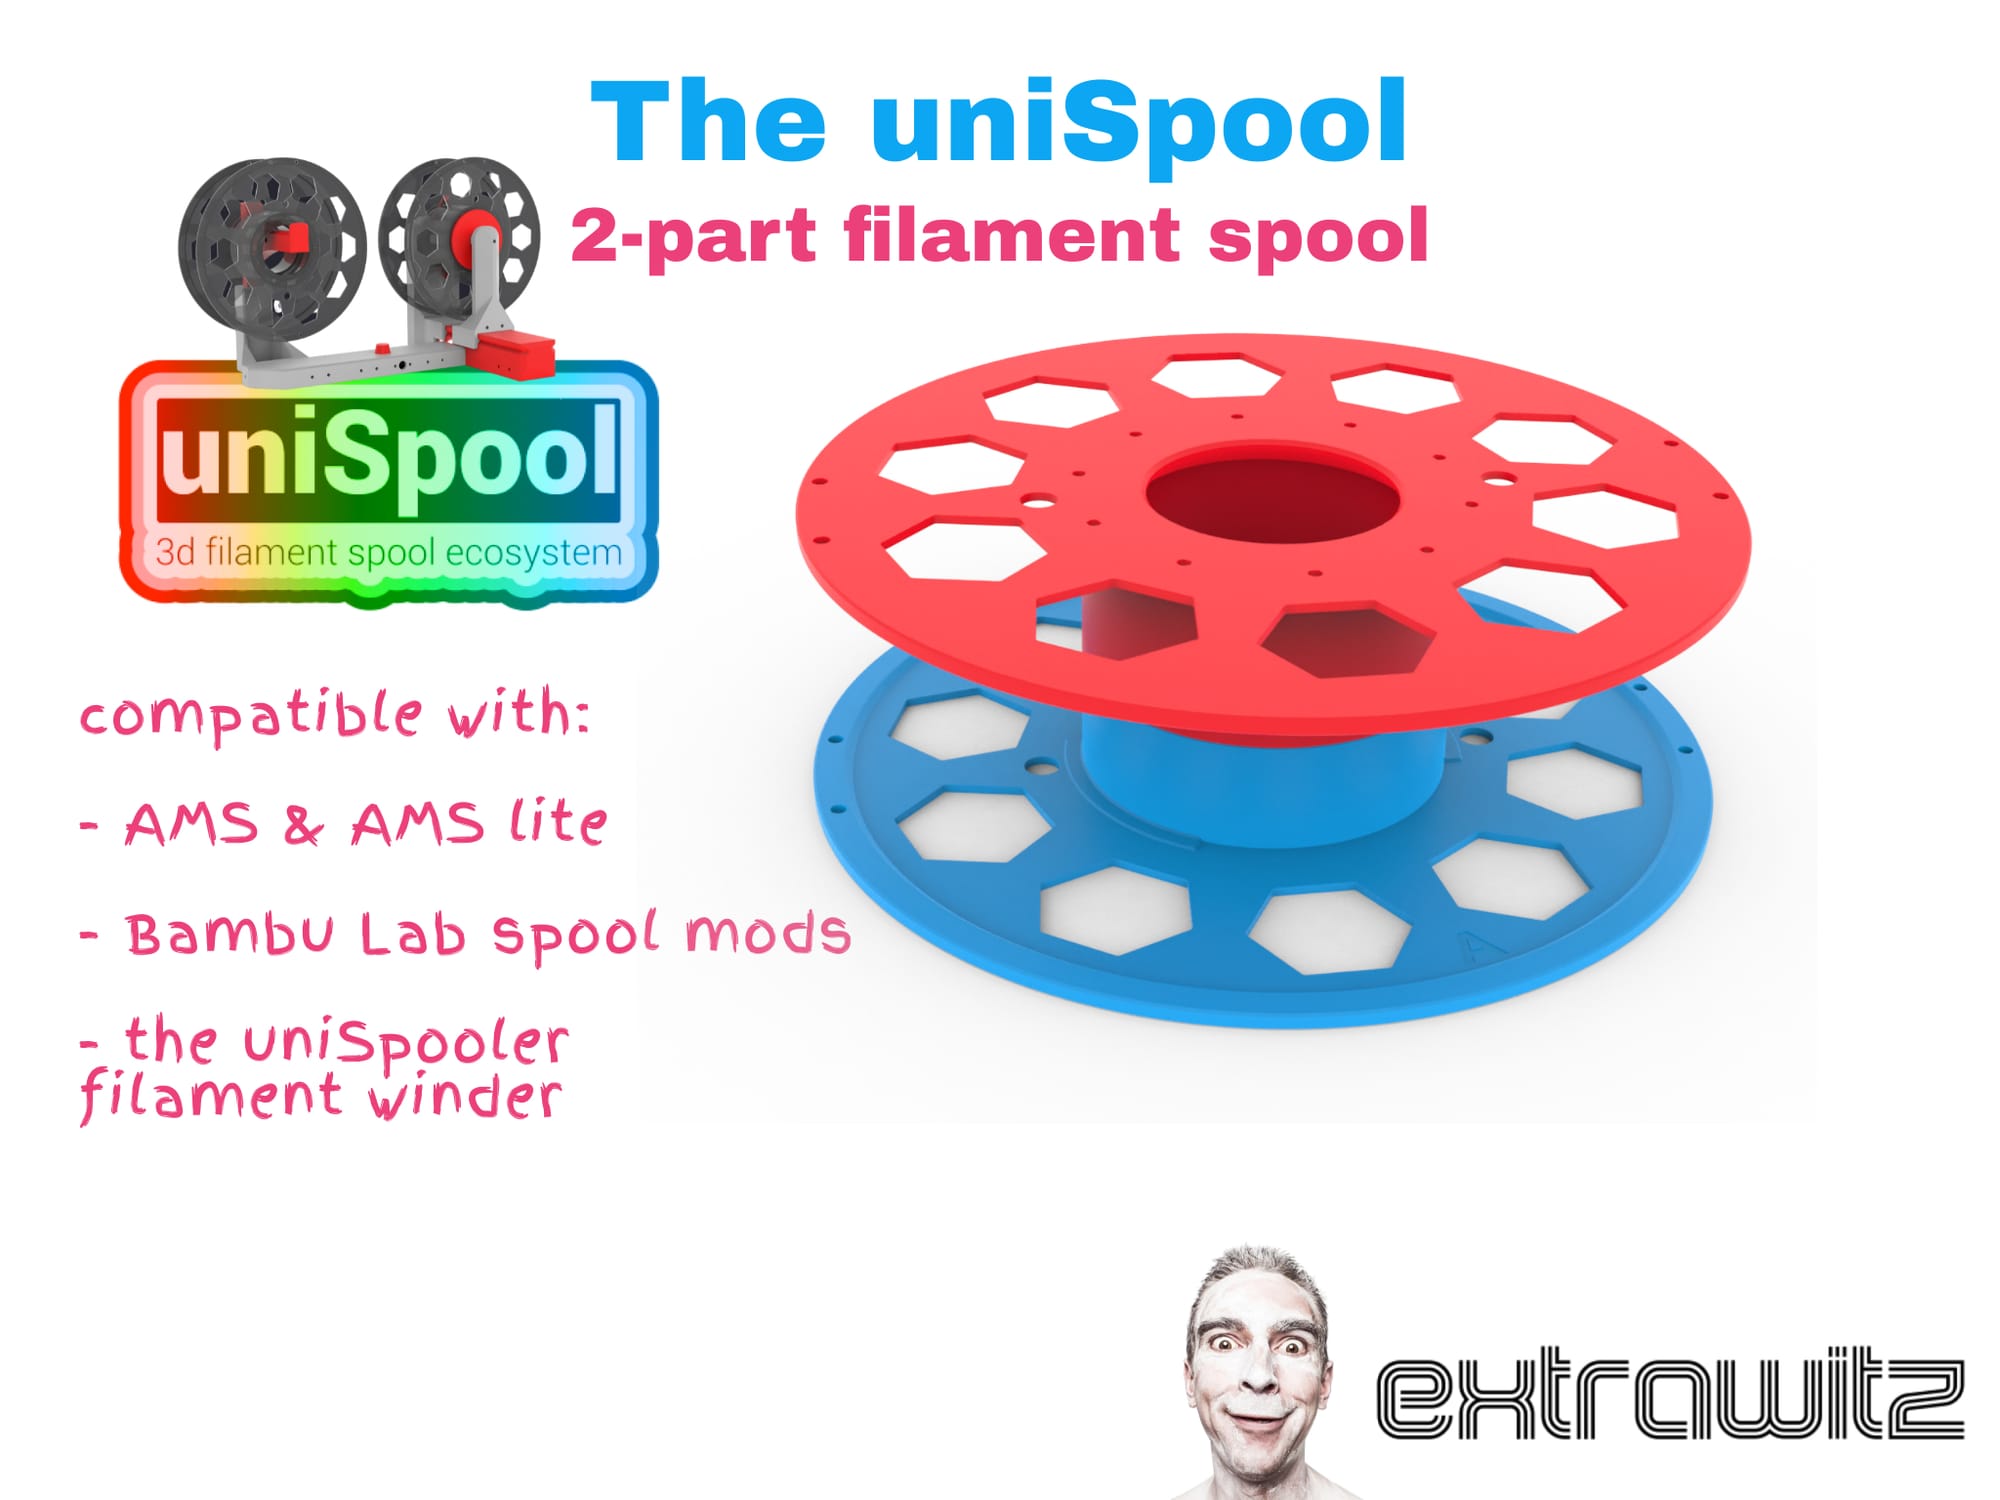
Download the uniSpool & uniSpooler from Makerworld
uniSpooler assembly instructions
This is a detailed instruction how to assemble the uniSpooler
Bill of materials
There is some stuff you will need to assemble the uniSpooler:
Obviously, you need a working, well calibrated 3D printer for this job. But even the Bambulab A1 mini is sufficient.
Filament:
I used PLA+ filament from SUNLU for the print of all parts of the uniSpooler. Other material will work. However, I love this PLA+ over PETG for printing such designs at the moment.
Non-printed hardware for assembly:
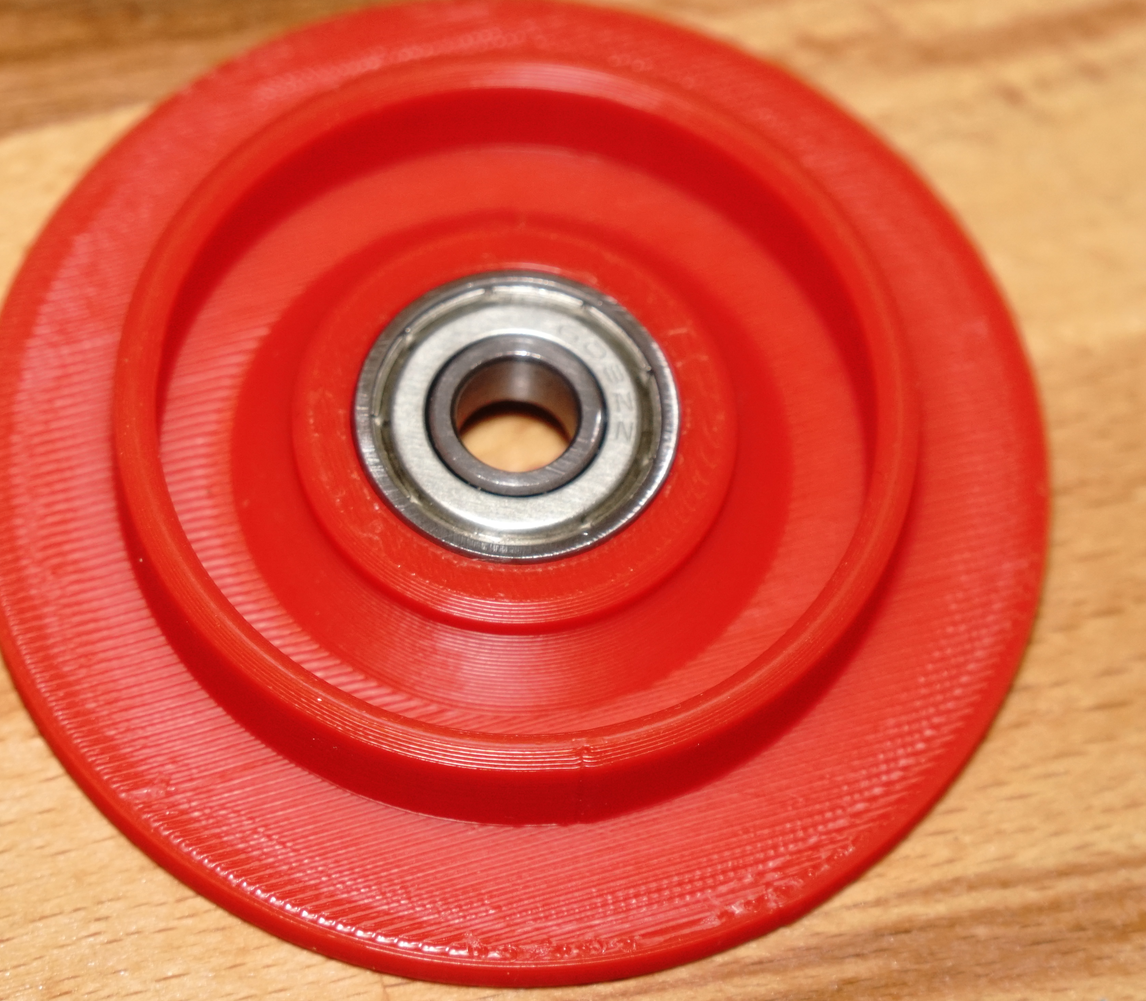
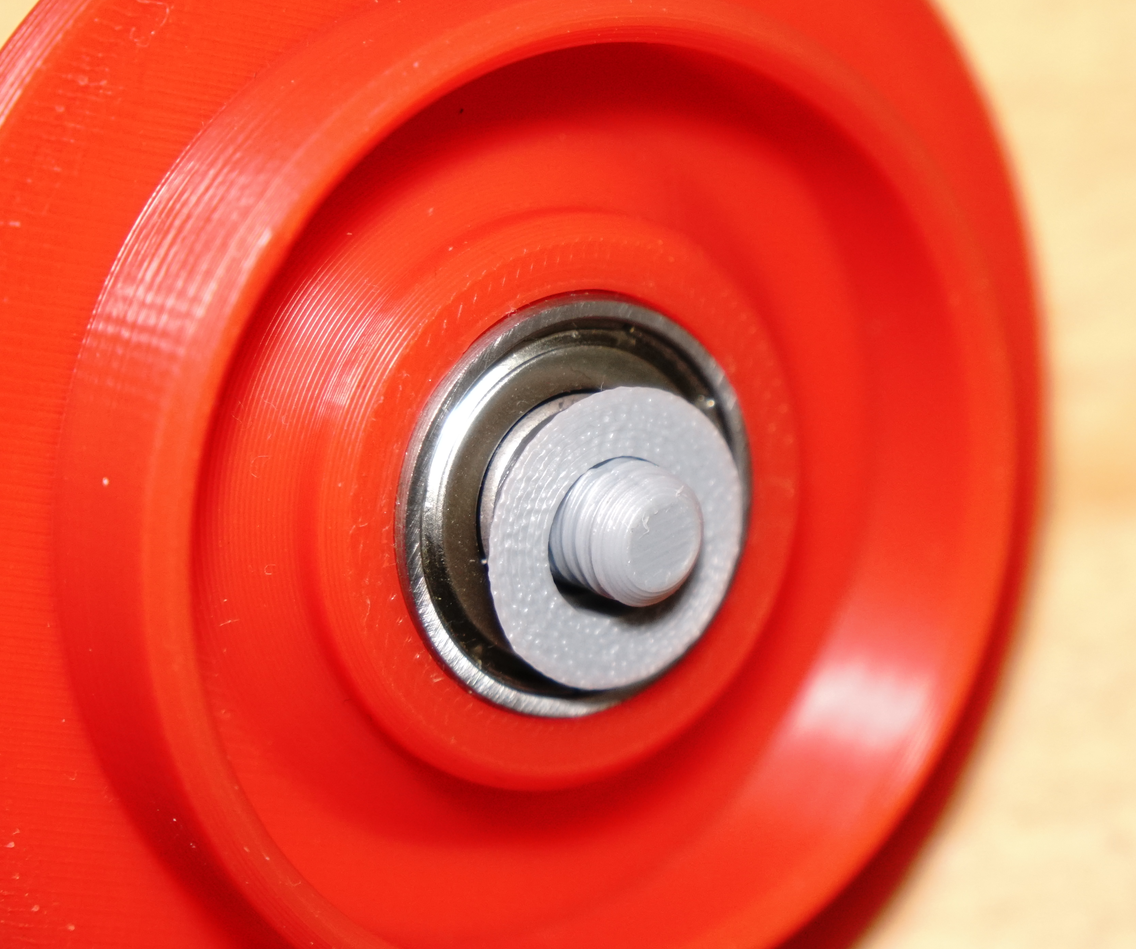
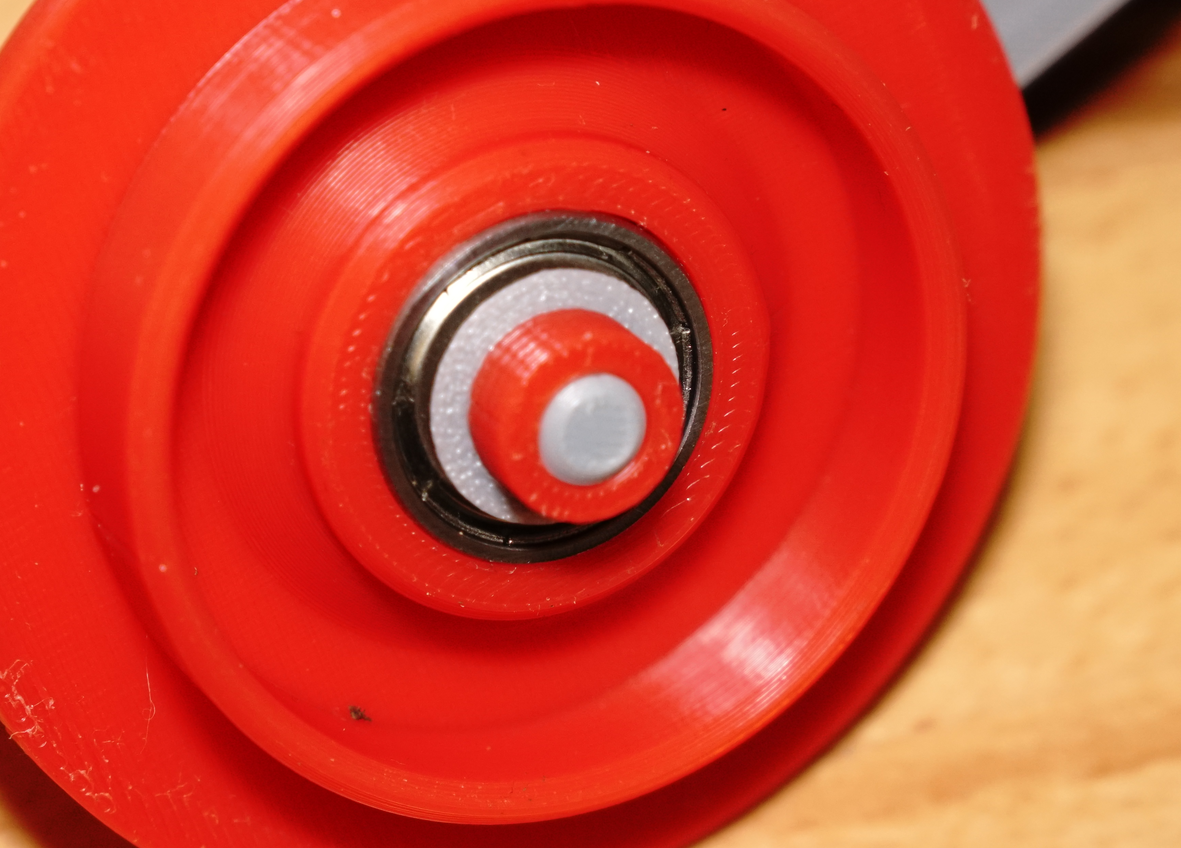
- 1 x 608ZZ skateboard bearing
- a bunch of M3 (metric) threaded inserts
- a bunch of M3x20 (metric) screws
- 1 x JGB37-520 worm gear 12V DC motor with around 100RPM
- 1 x DC motor speed controller
- 1x 12v 2A DC power supply
- 1 meter two-wire cable (diameter can be low as we only use 6 watts power)
- some small ferrules
- some small diameter heat shrink tubing
- 2-4 small zip ties
- small piece of PTFE tubing (for guiding the filament)
required Tools:
- a rubber mallet (clearance is for toys 😄)
- soldering iron & soldering tin
- crimping pliers or at least any pliers
- screwdriver or hex keys matching the screws
- hot air gun or at least a lighter
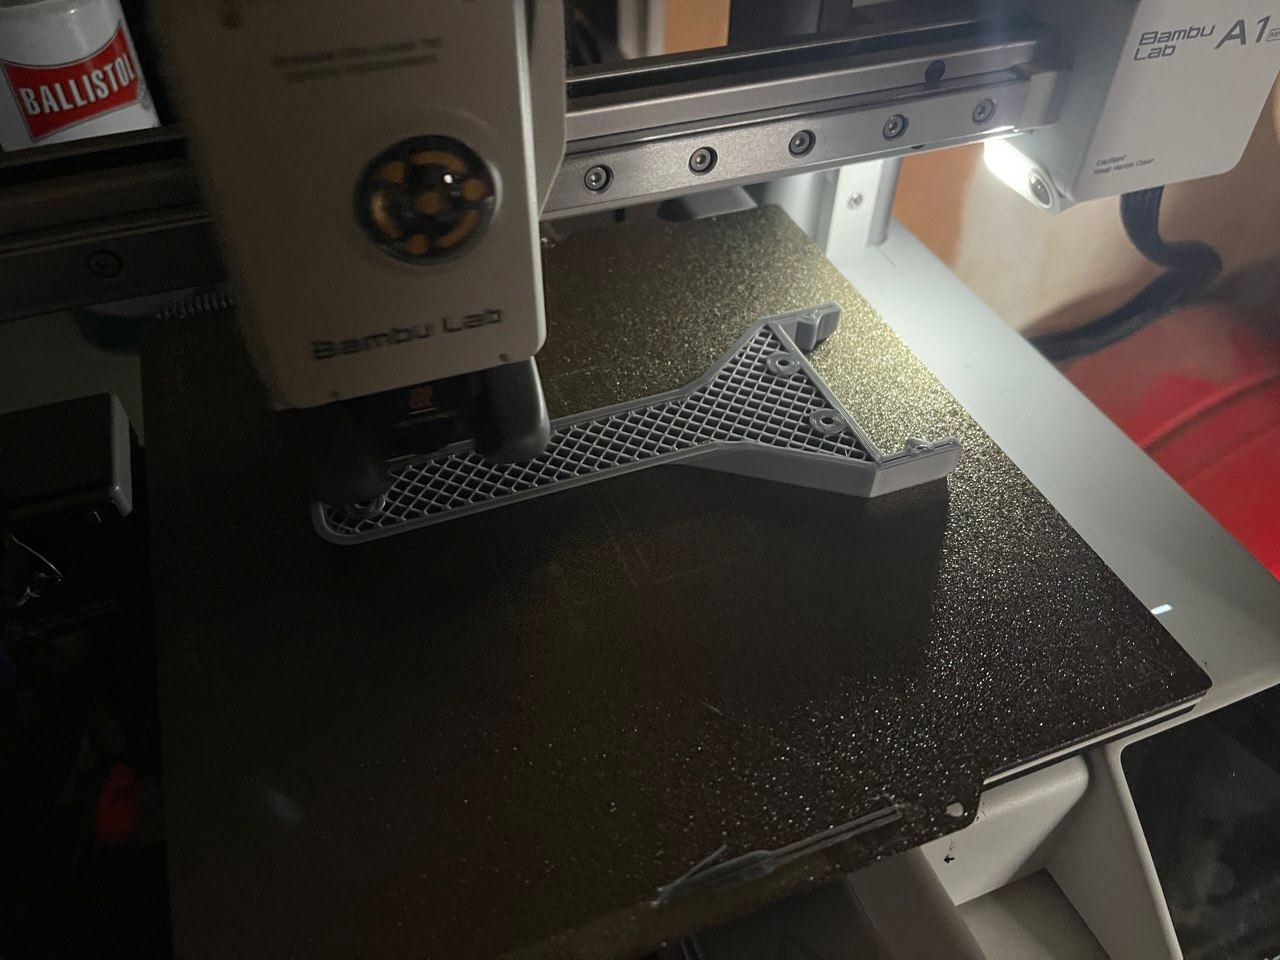
Step 1: print all parts
Print all parts as provided in the print-profile.
You have to print 3 plates of parts:
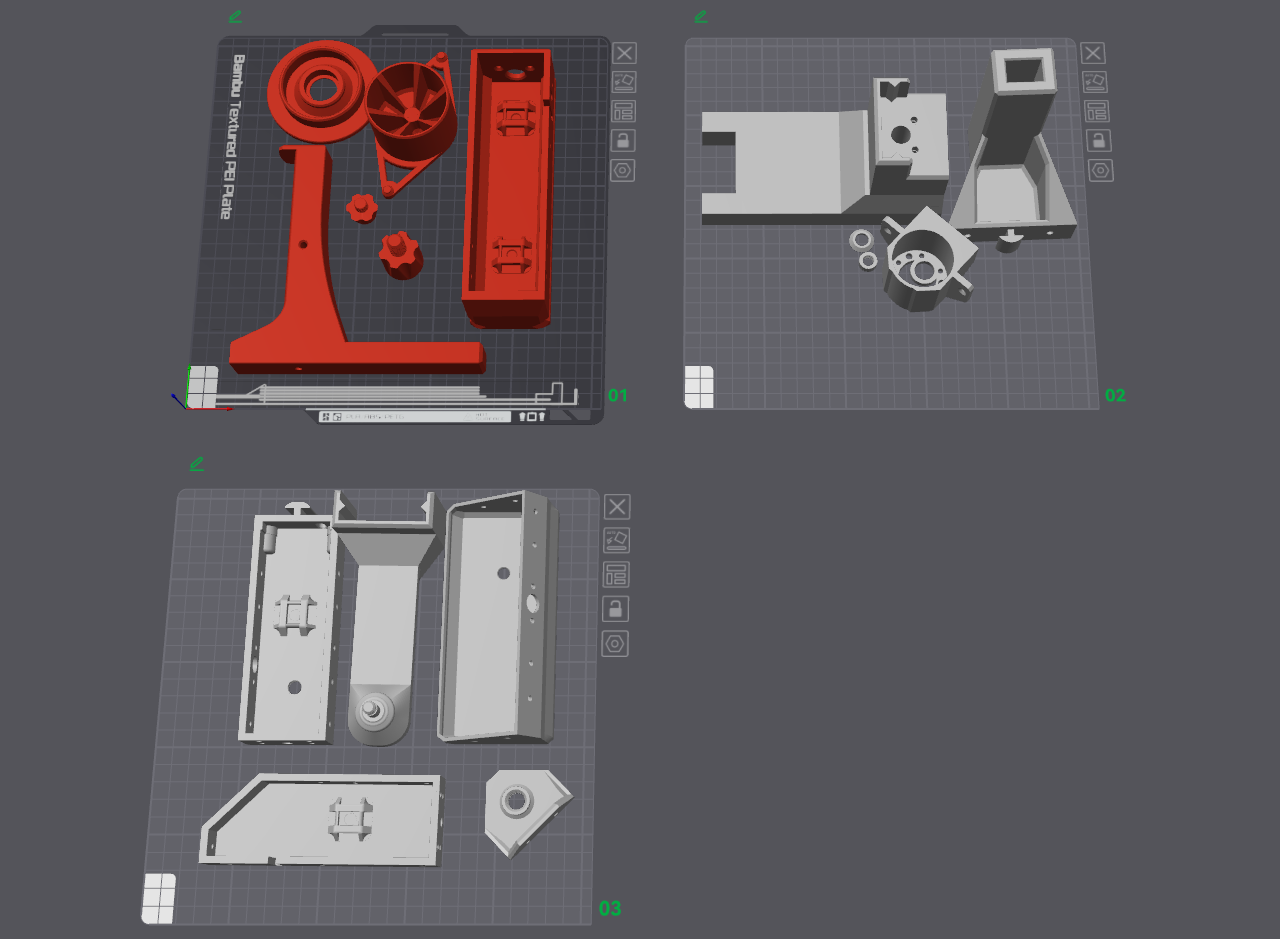
All parts are printable without support and require no clean-up. That was easy, huh?
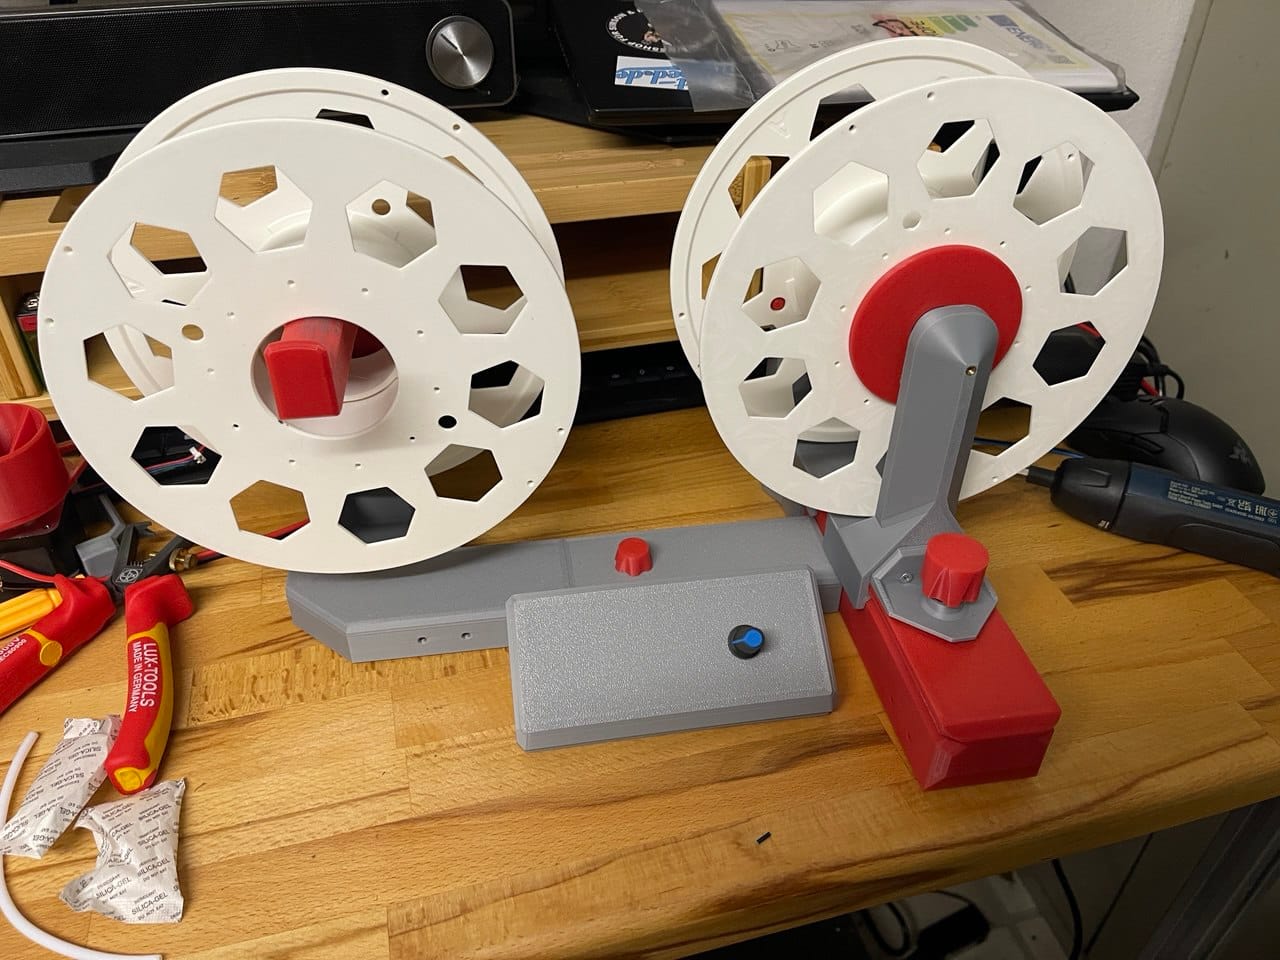
Step 2: Assemble the uniSpooler main parts:
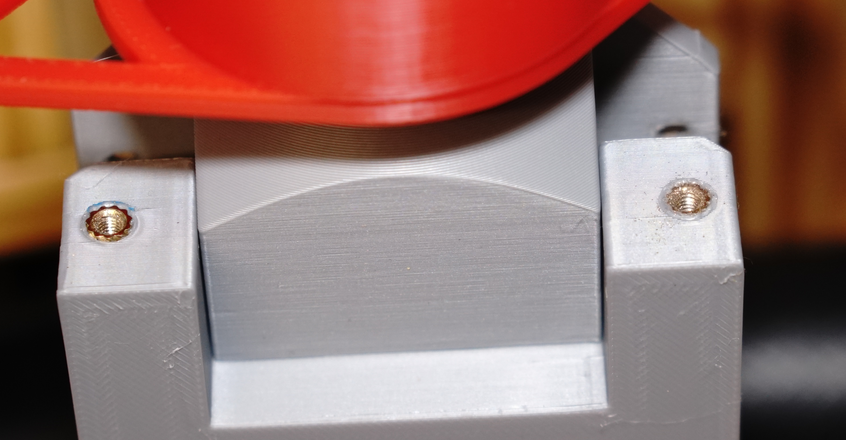
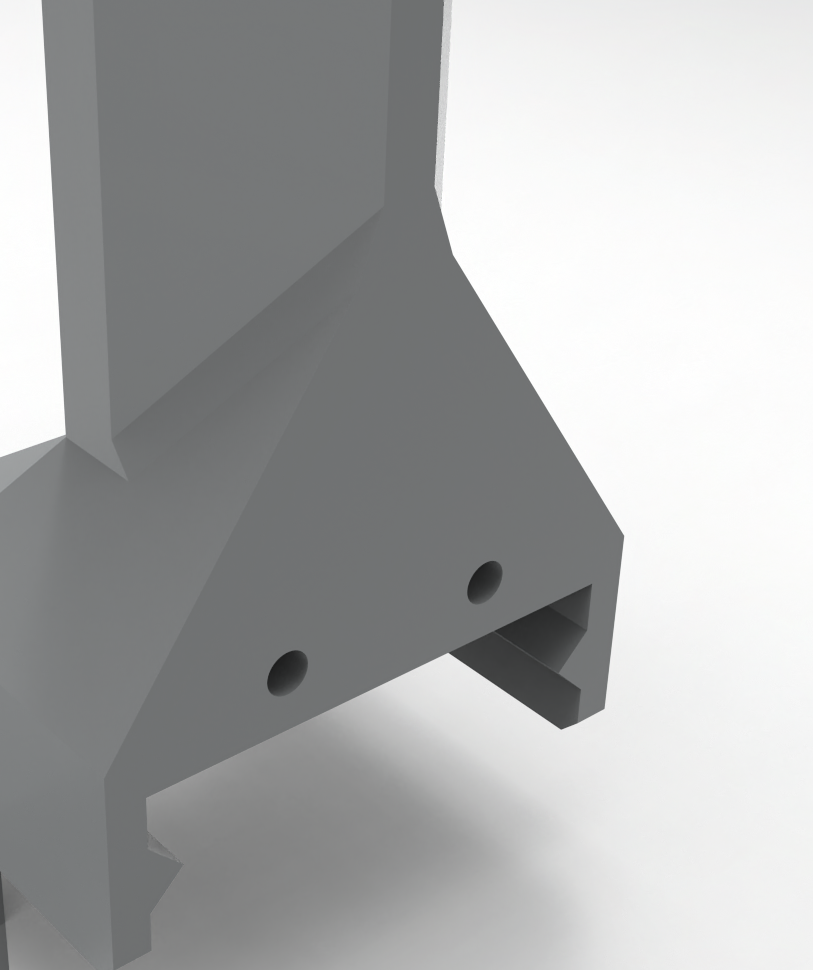
Assemble first the main parts, like in the image below, except the motor. Everything fits only in one order, so it should be doable without further explanation. Take the hammer to assemble the frame-parts when needed. They are designed sturdy enough to take the force.
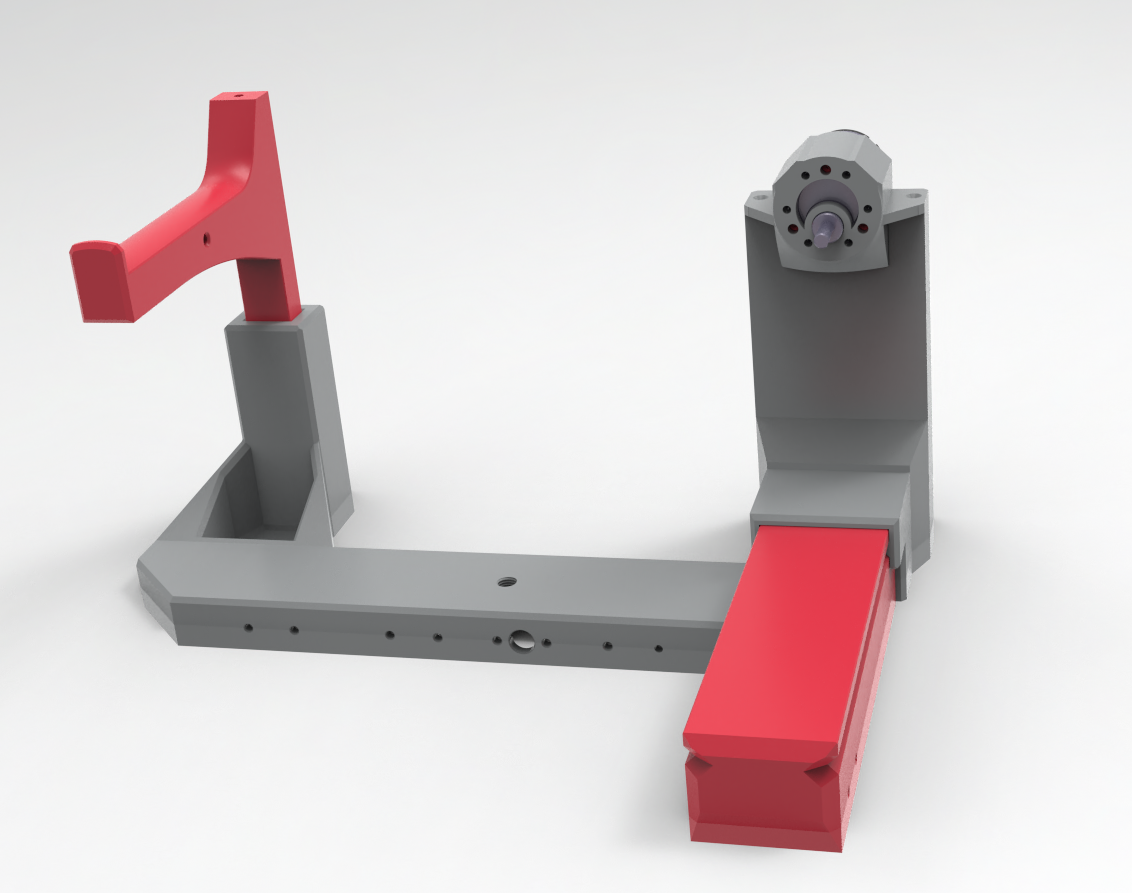
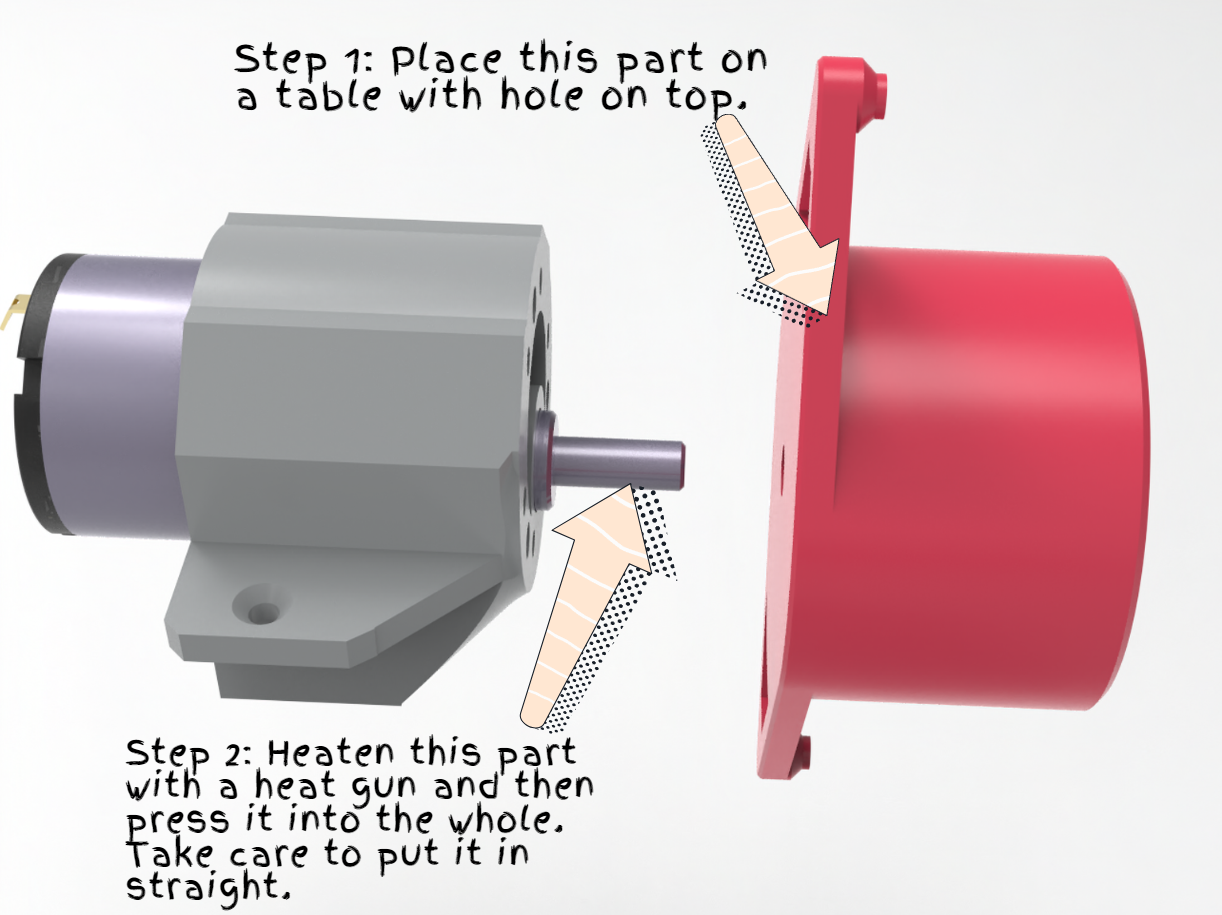
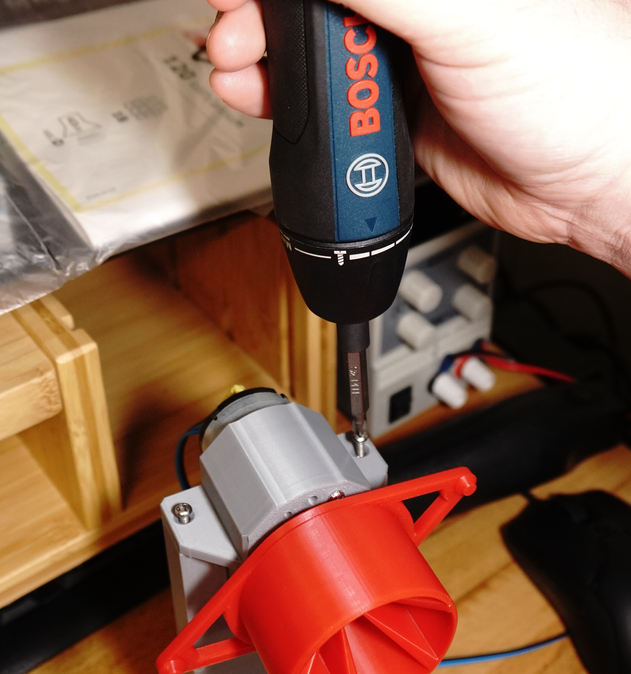
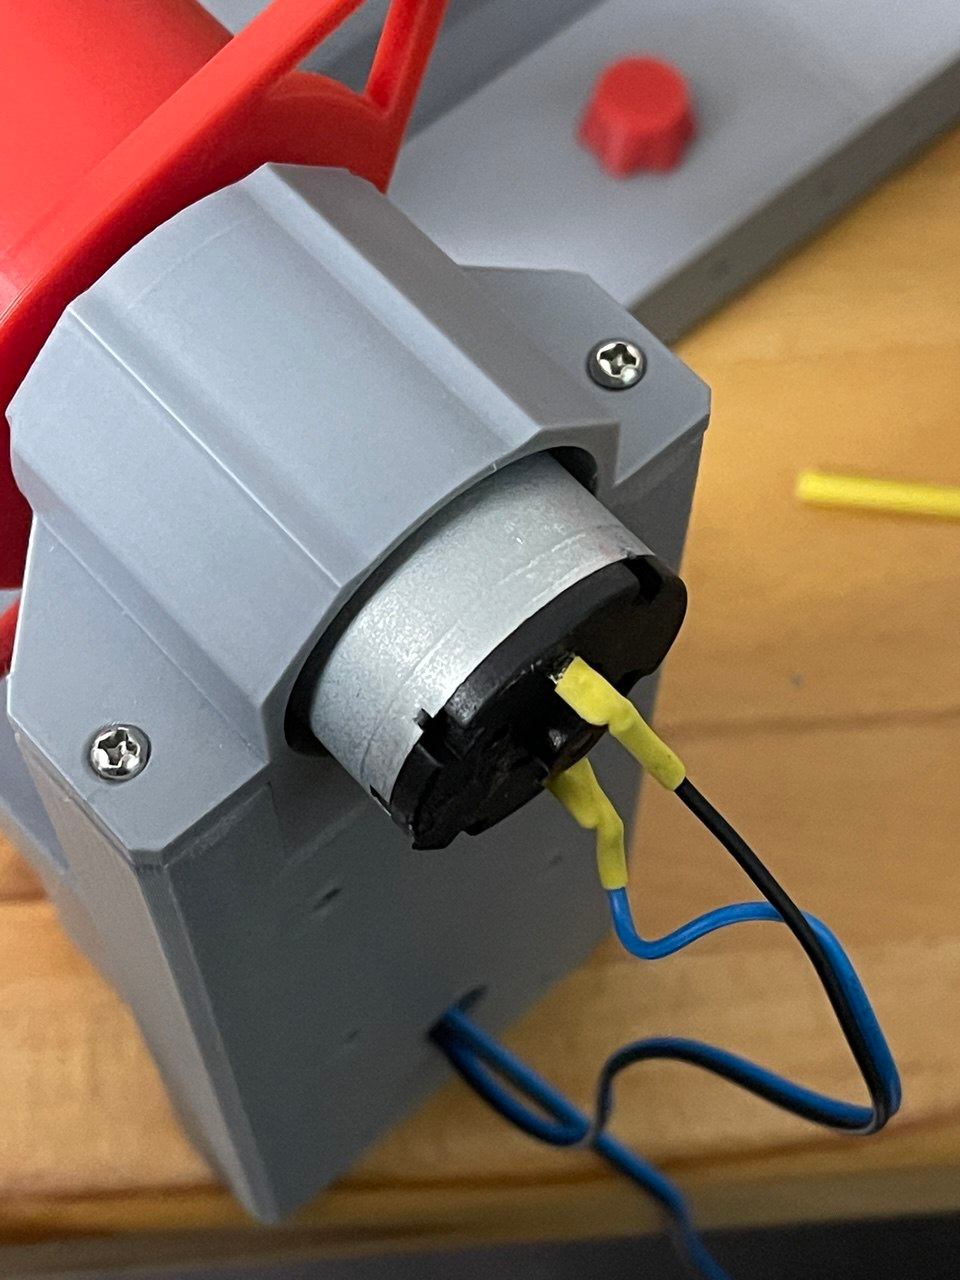
Assemble now the motor bracket and the motor.
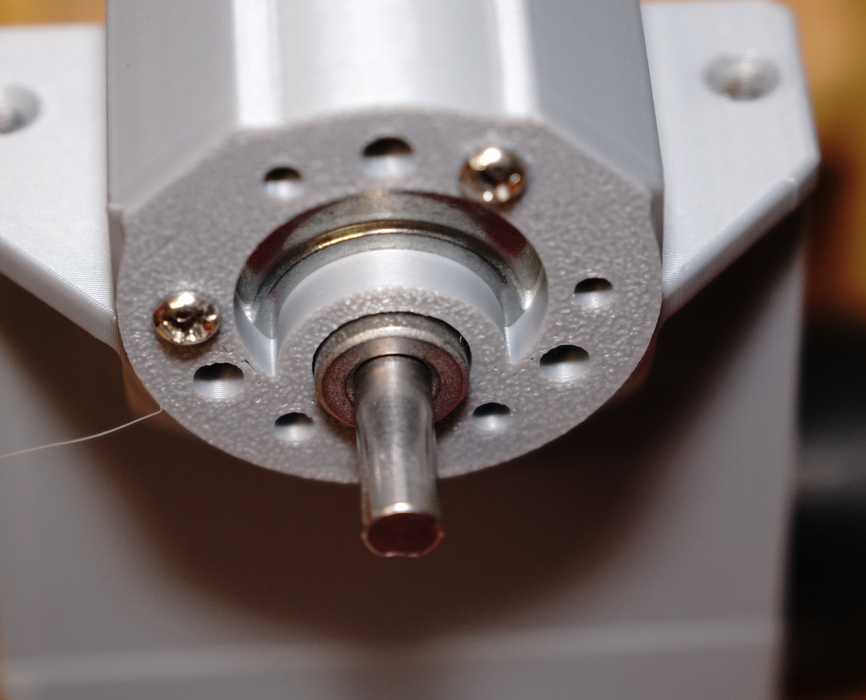
To install the spool-holder on the motor, please use a heated gun to heat up the mounting part of the motor and then press fit it to the spool holder part.
After you finished that, we can now screw the motor with its part of the spoolholder and its bracket to the socket
Please use threaded inserts on the bottom part. Only then it is really durable.
Now let's assemble the sliding part:
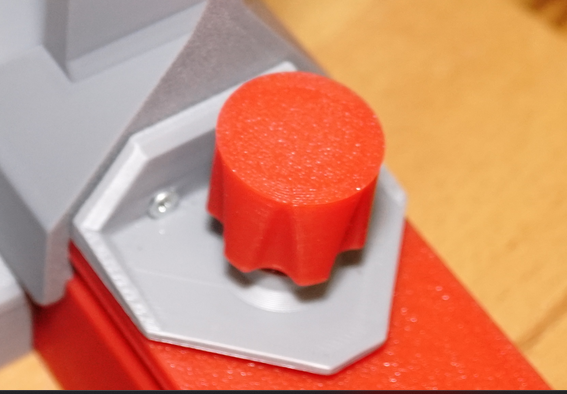
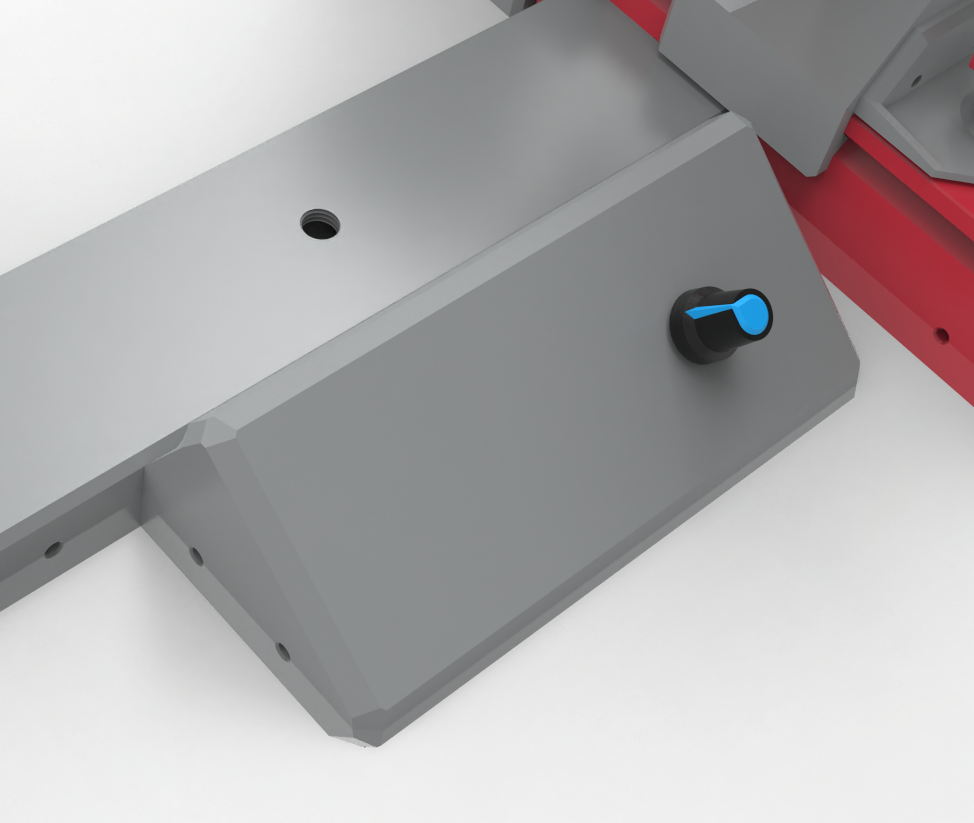
Then install the locking platform and its screw:
You can then slide the passive spool holder part on the sliding base-part.
Now let's assemble the controller
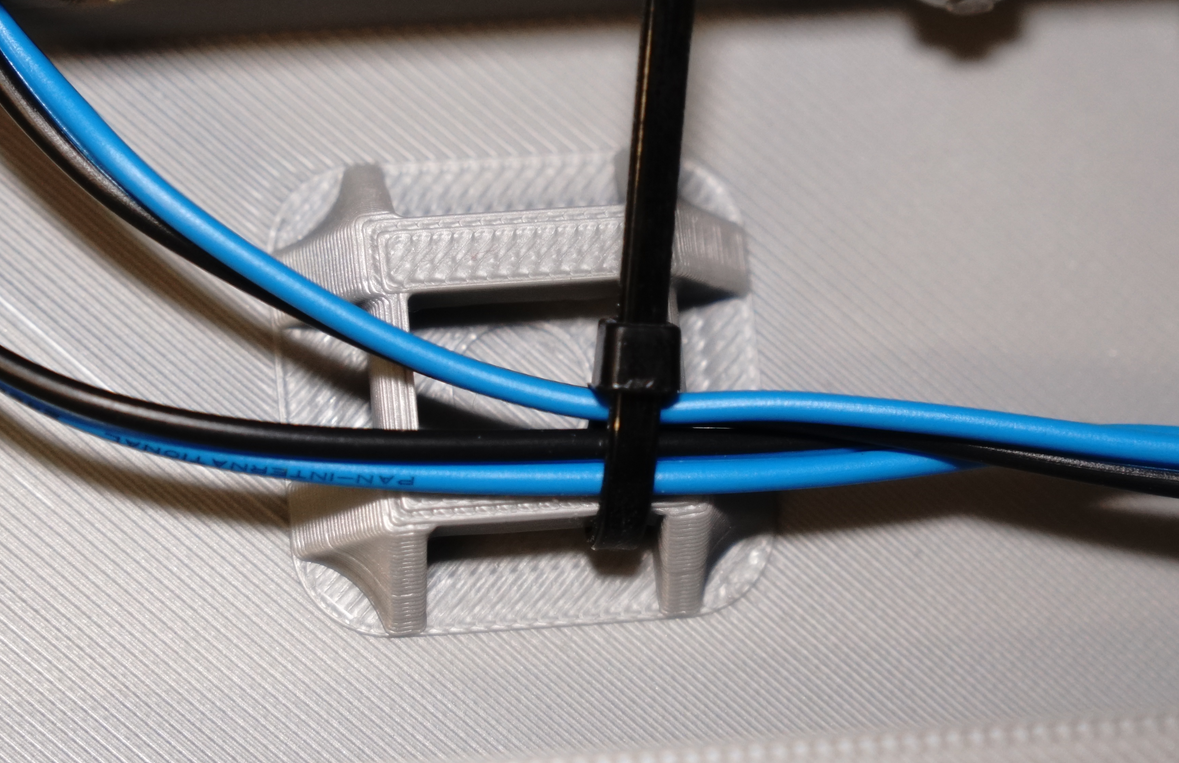
For the cables, have in mind they need to have a certain length to be guided to the housing.
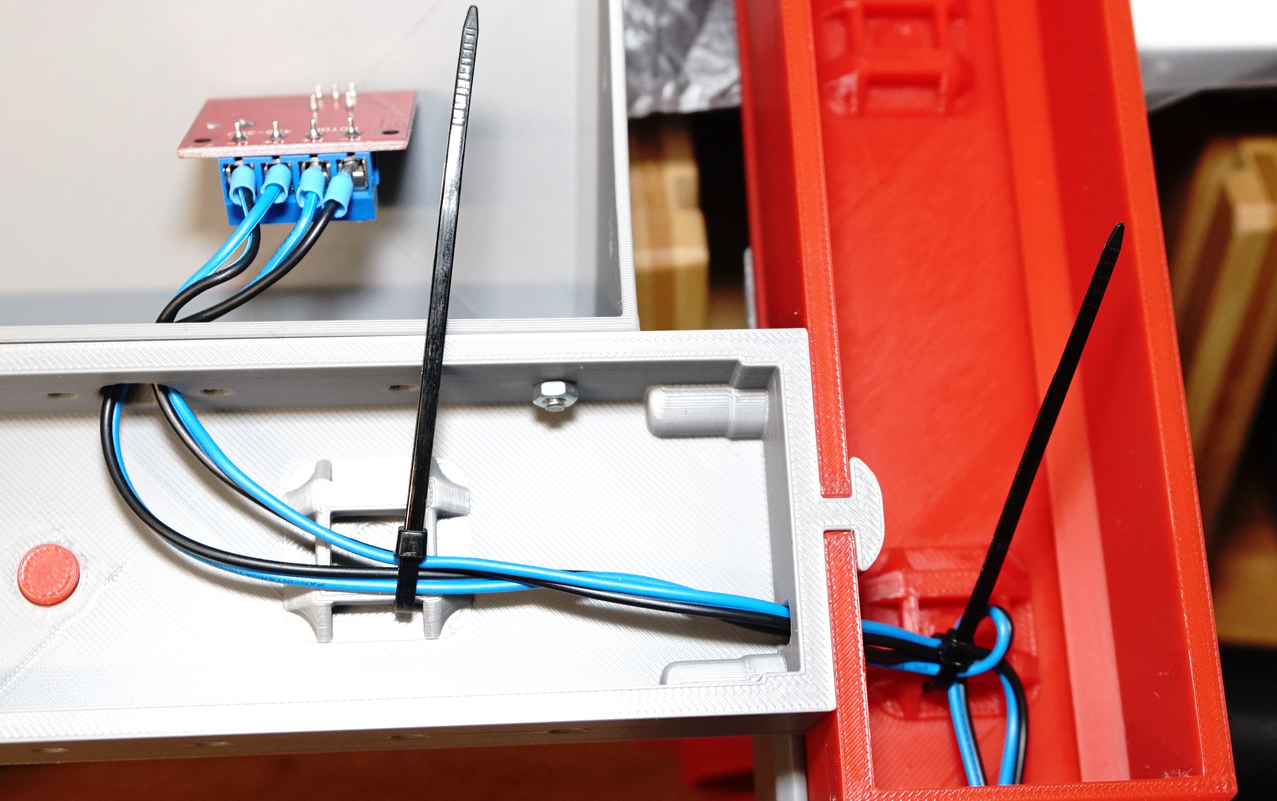
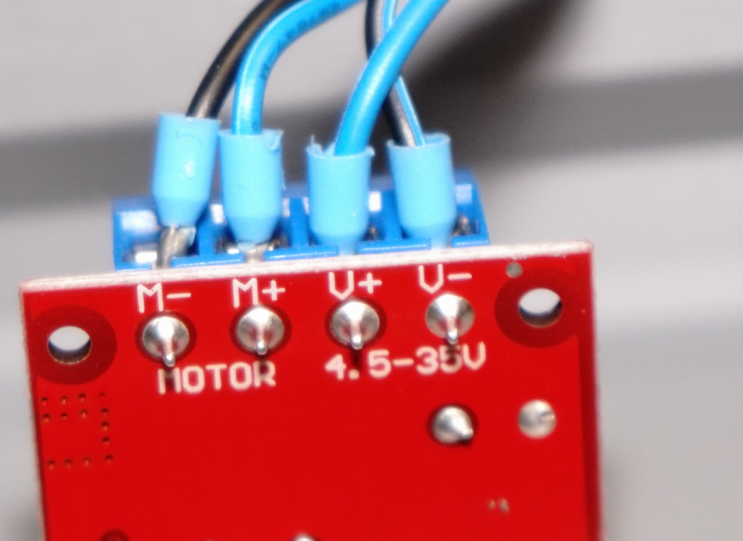
- Prepare the cables and add them to the DC motor controller. On the backside of the controller is the wiring instruction. (the "M" is for Motor, "V" is for DC power supply connection)
After you did that, screw the DC motor controller to the controller housing and then the controller housing to the uniSpooler main assembly.
Next, connect the power supply to the DC motor controller cable (to the cables which go to the V plus and minus interfaces). Take care to have the correct polarity here! Do this before you solder anything to the motor!
When you did that, test then the spinning direction of the motor by giving some power to it. It has to spin clockwise.
As a final step, solder the cables from the motor controller to the motor
Final finishing:
That's it. You made it. Now take a uniSpool and try it out! Happy filament winding!